Master Your Checkpoint
Welcome to our comprehensive guide for surviving and thriving in Quarantine Zone. These tips and strategies will help you make the right decisions, manage your resources effectively, and ultimately save humanity from the zombie apocalypse.
Learn the Infection Signs
Recognizing signs of infection quickly is crucial to preventing outbreaks. Here are the key symptoms to watch for:
The virus manifests in various ways, with symptoms progressing from mild to severe as infection advances. Early detection is your best defense against outbreaks. Remember that symptoms often appear in combinations - a single mild symptom might be harmless, but multiple symptoms together indicate higher risk. Use your inspection tools methodically: first check visible signs, then vital signs, and finally use advanced tools like the UV scanner for hidden symptoms. The infection has an incubation period of approximately 24-48 hours, during which symptoms may worsen rapidly. This is why proper quarantine protocol and daily follow-ups are essential for uncertain cases.

Yellow eyes
Generally safe, not a sign of infection

Conjunctivitis
Requires quarantine and follow-up

Red eyes
Serious warning sign, likely about to turn

Eye pus
Clear sign of infection, requires immediate action

Red skin
Generally safe, not a sign of infection

Pale skin
Requires quarantine for observation

Green skin
Critical sign of infection, about to turn

Herpes
Benign condition, not infection-related

Freckles
Benign condition, not infection-related

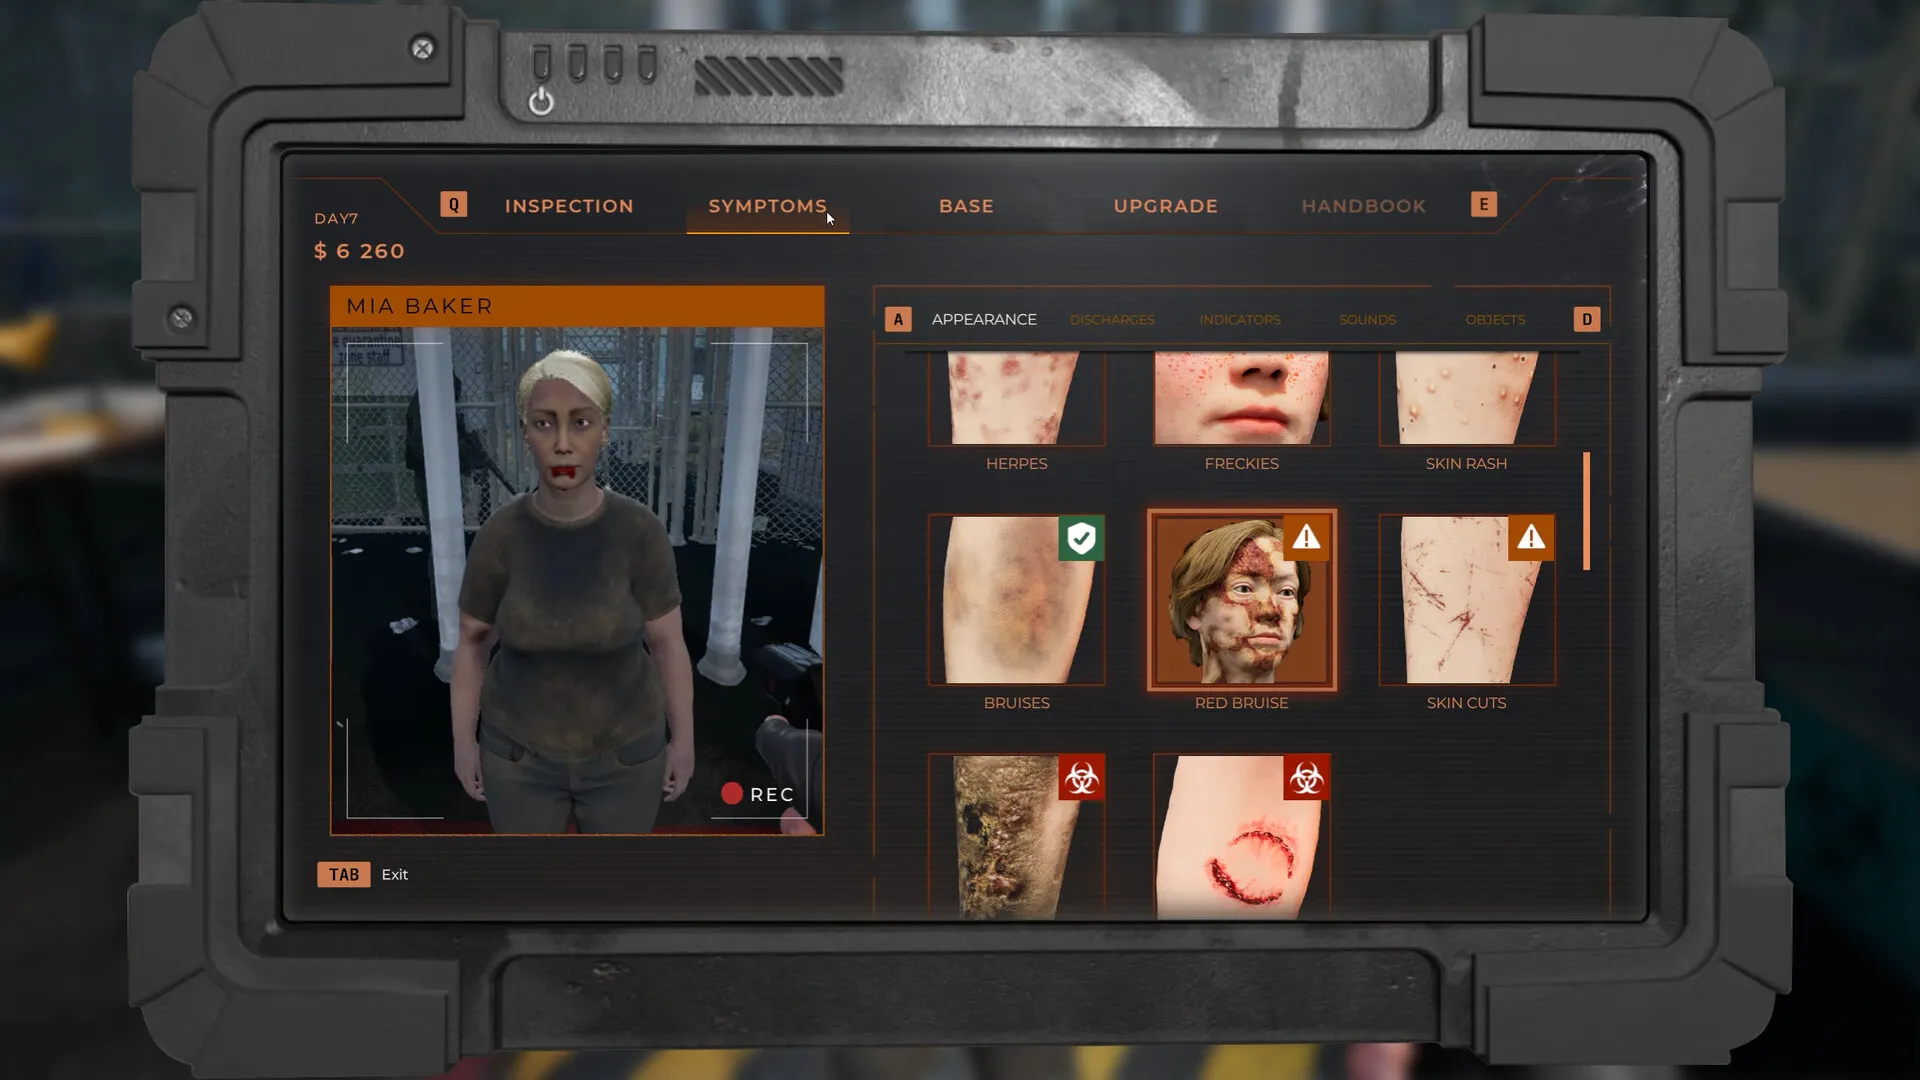
Bruises
Generally safe, not infection-related

Skin rash
Possible infection, requires quarantine

Red bruise
Possible infection, requires quarantine

Skin cuts
Requires quarantine and follow-up after 1 day
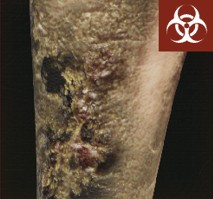
Necrosis
Terminal infection stage, requires liquidation

Bite mark
Definitive sign of infection, will turn
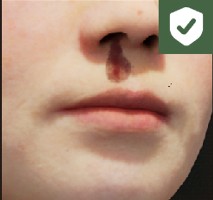
Nose bleed
Generally safe, not infection-related
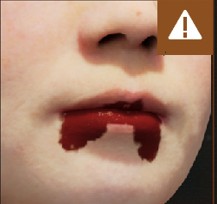
Mouth blood
Requires quarantine for observation

Nose pus
Clear sign of infection
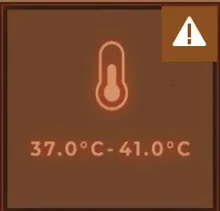
Elevated temperature
Requires quarantine
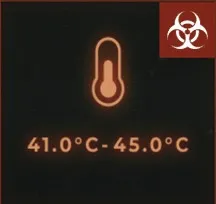
High temperature
Clear sign of infection

Elevated pulse
Requires quarantine and monitoring
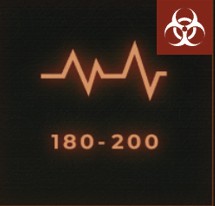
Extreme pulse
Definitive sign of infection
Behavioral Symptoms
- Sneezing or coughing: Requires quarantine
- Hiccups: Requires quarantine and follow-up
- Sick breath: Requires quarantine and monitoring
- Virus breath: Terminal sign, will turn into zombie
Critical Protocol Reminder
When in doubt, always err on the side of caution. A single missed infection can lead to catastrophic consequences for your entire checkpoint. Remember that some infected individuals may only show one or two subtle symptoms. If you suspect infection but cannot confirm it with basic tools, use the Syringe Scanner for definitive results.
Advanced Inspection Tools
Master these specialized inspection tools to catch even the most sophisticated deceptions:
- Scanner: Your primary tool for examining refugees. Use it to scan for bite marks, injuries, and other physical signs of infection. The built-in UV light reveals hidden infections that aren't visible to the naked eye.
- Stethoscope: Crucial for checking breathing patterns. Abnormal breathing sounds can indicate early stages of infection before other symptoms appear.
- Thermo-Pulse-Meter: This dual-function device monitors both temperature and pulse rate. Elevated readings require quarantine, while extreme readings indicate definite infection.
- Syringe Scanner: The most accurate tool for infection detection. It provides instant results but uses expensive materials, so reserve it for uncertain cases where other tools give mixed results.
- Pistol: Some infected individuals become aggressive due to the virus. Keep this handy for self-defense when refugees turn hostile unexpectedly.
- UV Flashlight: Use this specialized light to reveal hidden bite marks and infections that aren't visible under normal lighting conditions.
- Document Analyzer: Verifies identification papers against the database to spot inconsistencies and forgeries.
- Baggage Scanner: Always check refugees' belongings for contraband, weapons, or zombie-related materials that could pose a threat to your checkpoint.

Time Management
You only have limited time to process each refugee. Here's how to make every second count:
- Establish a routine: Develop a systematic approach to checking each refugee. Start with quick visual inspection, then vital signs, followed by more detailed scans.
- Prioritize quick checks first: Begin with temperature and pulse readings - these can immediately identify high-risk individuals who need quarantine or liquidation.
- Use hotkeys: Learn the touch shortcuts for quickly switching between tools to minimize transition time.
- Morning preparation: Review your daily reports first thing each morning to understand the current situation and plan your day accordingly.
- Quarantine management: Check on quarantined individuals daily - leaving them unattended for more than 2 days risks infection spread if they turn.
- Peak hours strategy: Prepare for rush periods by ensuring all your tools are readily accessible and your quarantine area has space.
- Night defense readiness: Set aside time before nightfall to check your defenses and ensure all weapons are upgraded and ready for potential zombie attacks.
- Resource monitoring: Regularly check your supplies and order more before you run critically low to avoid camp unrest.
Quarantine Management
The quarantine area is critical for handling uncertain cases and preventing outbreaks:
- Initial capacity: Your quarantine zone starts with space for 4 people. Plan carefully as this limited space fills quickly during busy periods.
- Daily follow-ups: Check on quarantined individuals every day. Those showing improvement can be cleared, while those deteriorating must be sent to liquidation.
- Two-day maximum: Never leave someone in quarantine for more than 2 days. If they're infected and turn, they'll bite others in quarantine, potentially causing multiple casualties.
- Symptom monitoring: Many symptoms like coughing, elevated temperature, or skin rash require quarantine and observation rather than immediate action.
- Upgrade priority: Consider expanding your quarantine facilities as one of your early upgrades, especially if you prefer a cautious approach to refugee processing.
- Cleaning procedures: After removing someone from quarantine (either to clearance or liquidation), ensure the area is sanitized before admitting new cases.
- Record keeping: Keep mental notes of who's in quarantine and for how long to avoid dangerous oversights.
Base Development
Your checkpoint needs constant improvement to survive:
- Upgrade priorities: Focus first on inspection tools to improve detection accuracy, then defensive capabilities to handle increasingly difficult zombie attacks.
- Weapon upgrades: Regularly enhance your mini-gun and rocket launcher to increase damage output and reload speed as zombie hordes become stronger.
- Quarantine expansion: Upgrade your quarantine area to accommodate more people, reducing the risk of turning away potentially salvageable refugees.
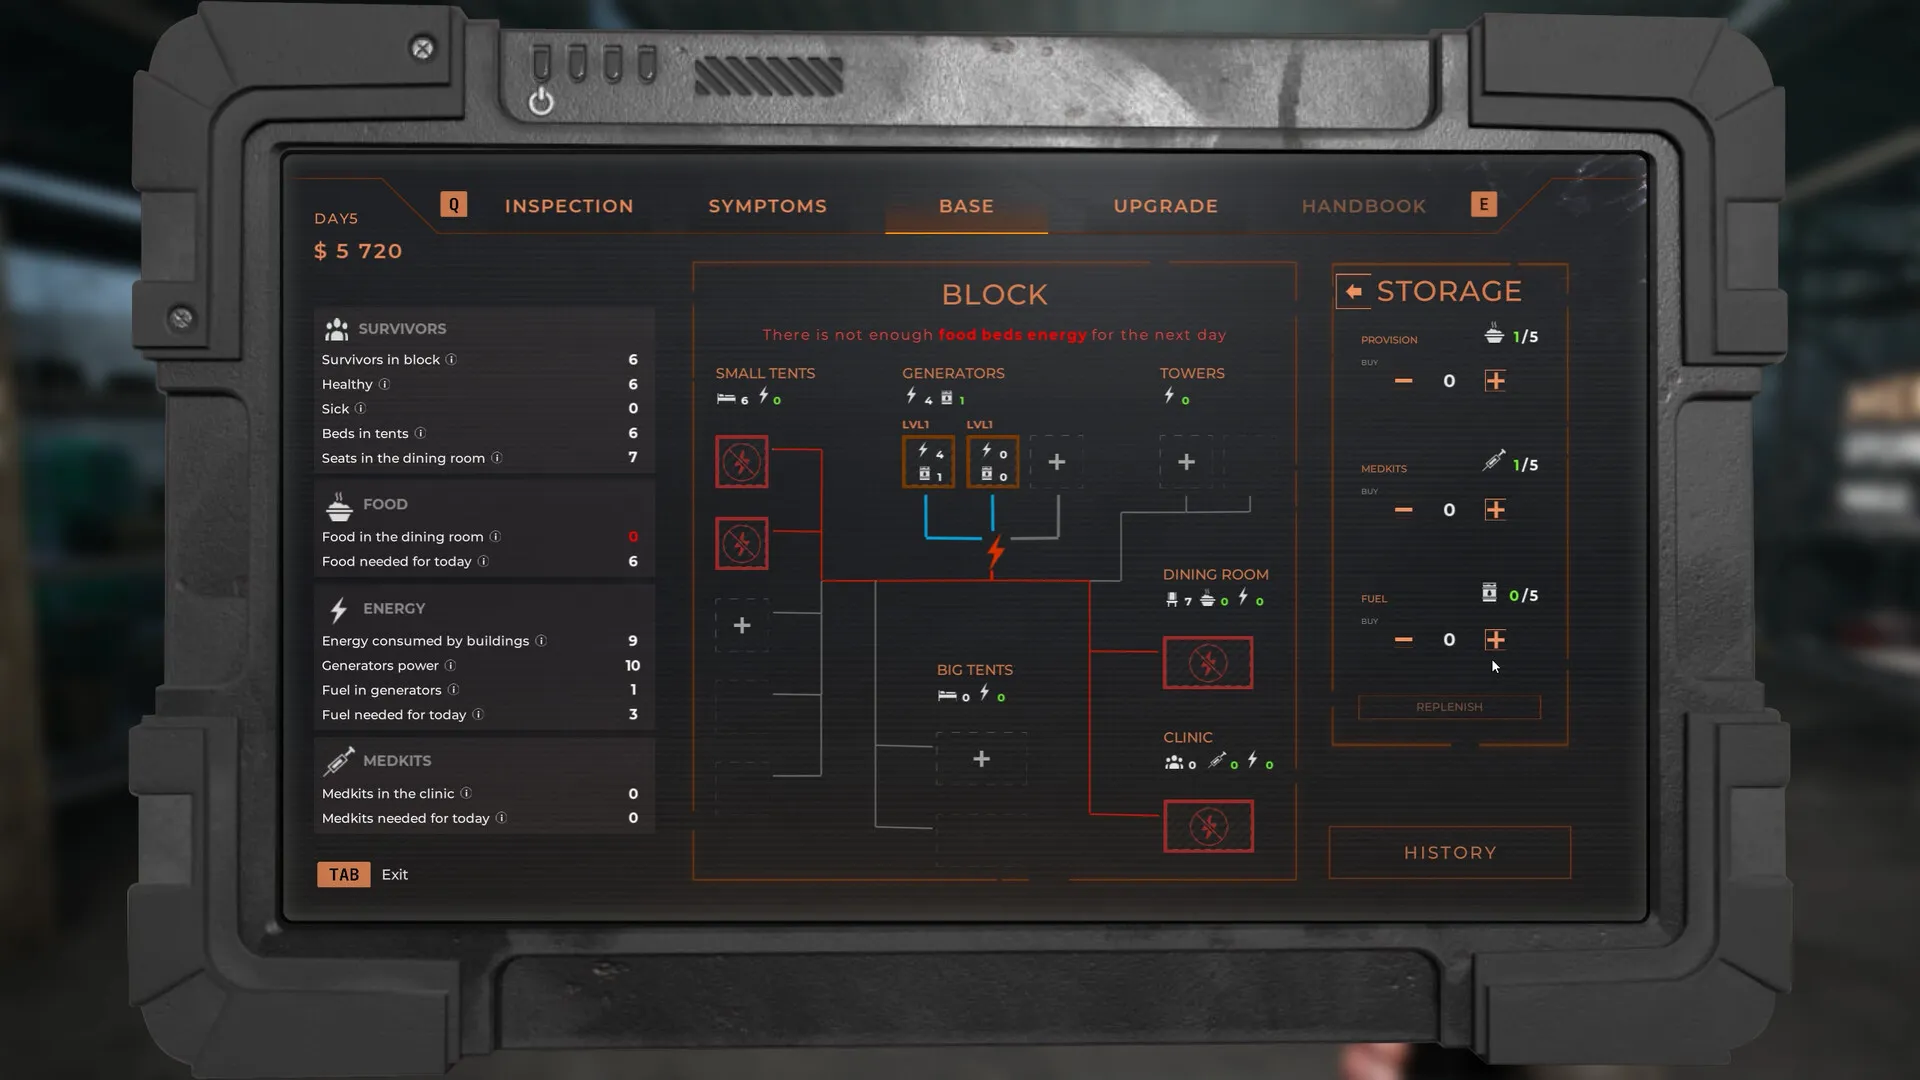
- Resource management: Monitor your camp's food, fuel, and medical supplies through your tablet. Order resources before they run critically low to prevent riots.
- Generator maintenance: Keep your generators fueled at all times - power outages can lead to chaos in the camp and make you vulnerable to attacks.
- Evacuation zone: Properly cleared survivors go to the evacuation zone. Ensure this area has adequate resources as its population grows.
- Defensive perimeter: Regularly check and reinforce your base's walls and gates to prevent breaches during zombie attacks.
- Drone upgrades: Enhance your defensive drone's capabilities to better handle large-scale zombie assaults.
Resource Management
Keeping your camp supplied is essential for survival and maintaining order:
- Essential supplies: Your camp requires three critical resources: food for survivors, fuel for generators, and medical supplies for the infirmary.
- Regular monitoring: Check your resource levels daily through your tablet. Running out of any essential supply can lead to riots and chaos.
- Evacuation zone needs: Every survivor you clear will be sent to the evacuation zone, increasing resource consumption. More people means more supplies needed.
- Generator maintenance: Generators provide power to your entire camp. If they run out of fuel, security systems may fail and living conditions deteriorate.
- Bulk purchasing: Buying resources in bulk can be expensive initially but saves money in the long run. Balance your budget between supplies and upgrades.
- Emergency reserves: Always maintain a small emergency reserve of each resource type to handle unexpected situations.
- Resource allocation: Prioritize food during population growth, fuel during defense-heavy periods, and medical supplies when processing many potentially infected refugees.
Strategic Decision Making
Your decisions affect both immediate outcomes and the long-term story:
- Three critical choices: For each refugee, you must decide whether to admit them to the camp, place them in quarantine for observation, or send them to liquidation. Each decision carries consequences.
- Balancing humanity with security: Being too lenient risks outbreaks within your camp, while excessive harshness lowers morale and civilian support. Find the right balance.
- Quarantine follow-up: Always check on quarantined individuals after one day. If their condition improves, they can join the camp; if it worsens, they should be liquidated before they turn.
- Risk assessment: Some symptoms require immediate action (like bite marks or necrosis), while others warrant observation (like elevated temperature or skin rash). Learn to distinguish between them.
- Identifying VIPs: Some refugees have special skills that could benefit your camp. Doctors, engineers, and military personnel are particularly valuable and worth saving when possible.
- Building relationships: Recurring characters will remember how you treated them. Building positive relationships can open new opportunities and resources.
- Resource allocation: Balance spending between tool upgrades, defense improvements, and supplies. Prioritize based on your most immediate threats.
- Long-term planning: Consider how your decisions today will affect your camp's survival tomorrow. Sometimes short-term sacrifices lead to long-term security.
Defending Your Checkpoint
When the inevitable zombie attacks occur, these strategies will help you survive:
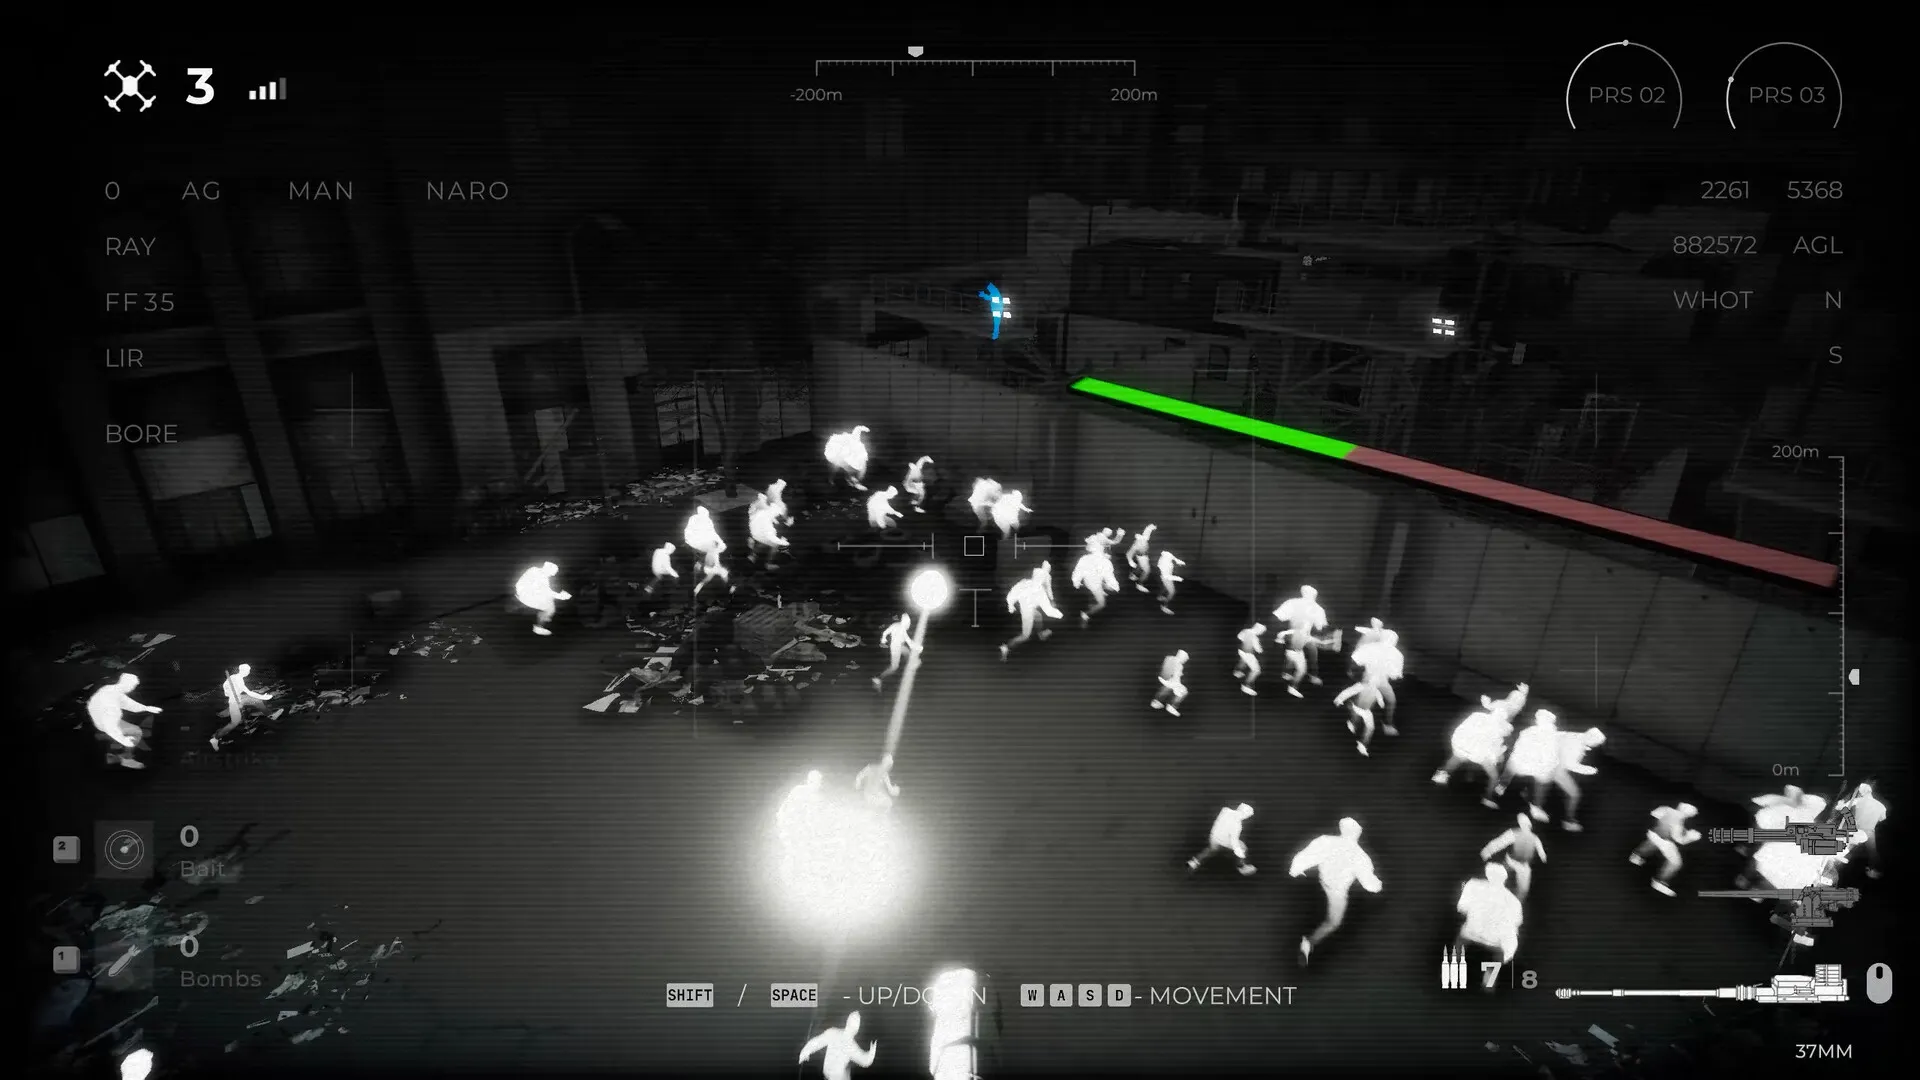
- Drone combat: Your primary defense is the combat drone equipped with a mini-gun and rocket launcher. Learn to switch between these weapons based on the threat type.
- Weapon selection: Use the mini-gun for regular zombies and spread-out groups. Reserve rockets for concentrated hordes or stronger special zombies.
- Regular upgrades: Zombies will become stronger as you progress. Consistently upgrade your weapons' damage output and reload speed to keep pace with the threat.
- Prioritize targets: Focus on eliminating the most dangerous zombies first - those closest to your gates or special variants that pose greater threats.
- Create bottlenecks: Position your defenses to funnel zombies through narrow passages where they can be eliminated more efficiently.
- Conserve ammunition: Aim for headshots and short, controlled bursts rather than continuous fire to maximize your ammunition efficiency.
- Prepare before nightfall: Zombie attacks are more frequent and intense at night. Ensure all defenses are operational before darkness falls.
- Emergency protocols: If zombies breach your perimeter, have a contingency plan to evacuate essential personnel and secure critical resources.